
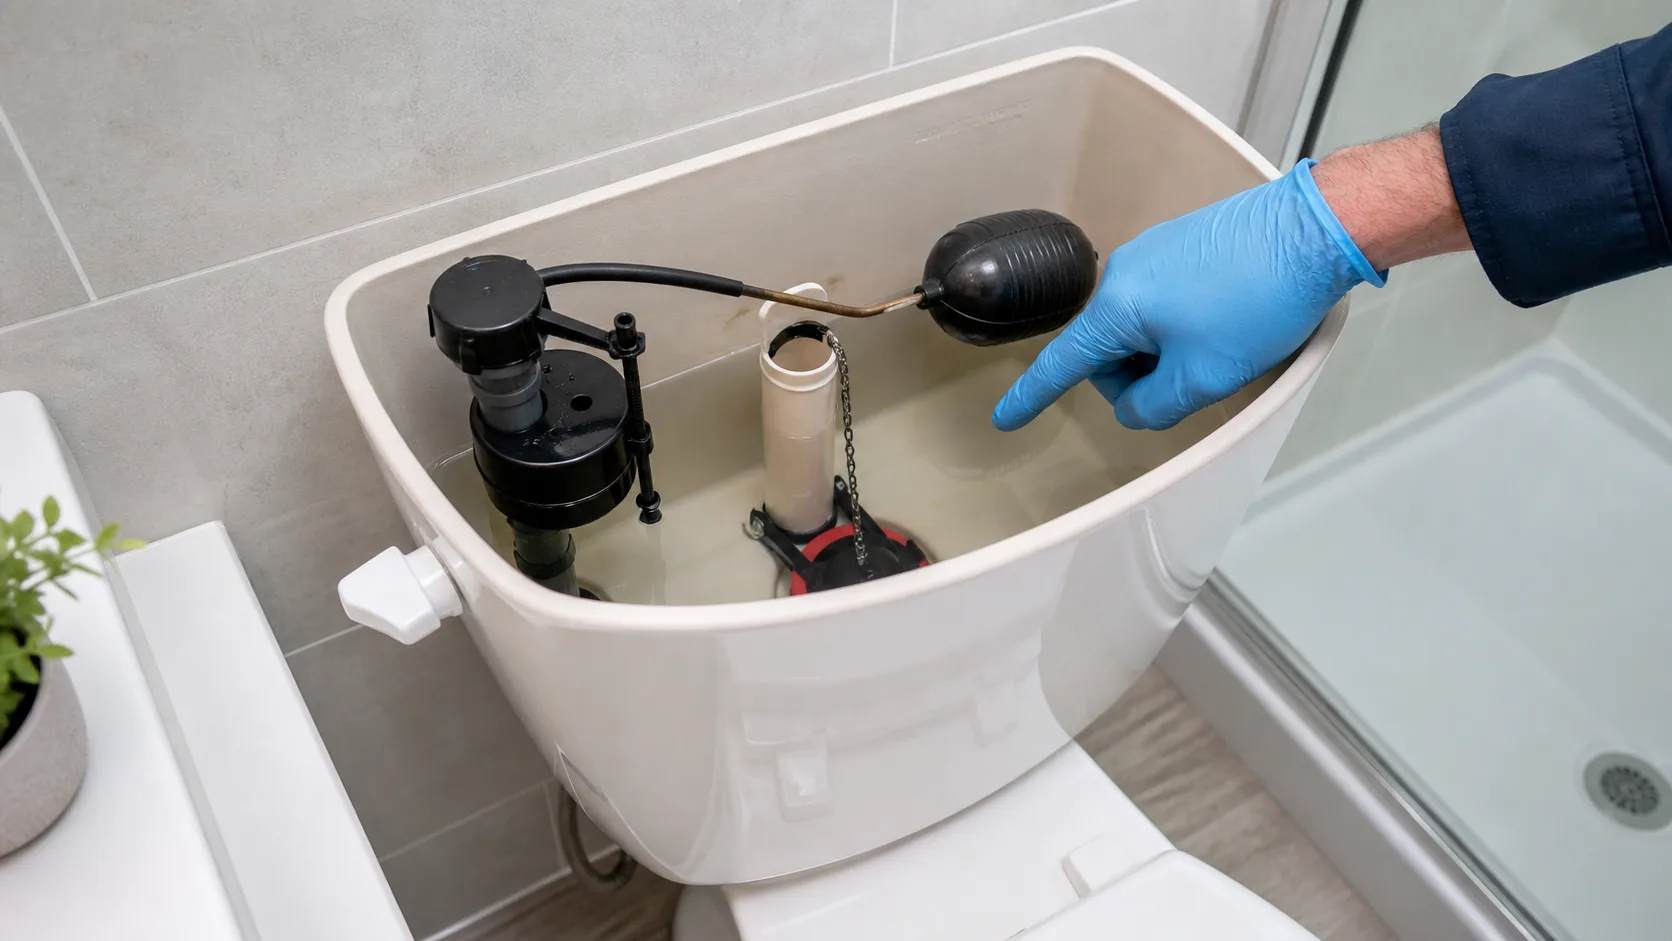
A toilet that keeps refilling is usually losing water from the tank into the bowl or failing to shut the incoming water off at the correct level. The good news is that many causes are visible inside the tank. The first priority is stopping the waste without cracking a valve or overflowing the bowl.
Remove the tank lid carefully and set it on a towel. If the bowl is rising or the toilet is clogged, do not keep flushing. Turn the shutoff valve behind or beside the toilet clockwise with gentle pressure. If the valve will not move or begins leaking, stop and close the home's main water valve if the situation is urgent and safe.
Listen for the running pattern
A constant hiss usually means the fill valve never shuts off or water is flowing into the overflow tube. A brief refill every few minutes often means water is slowly leaking past the flapper or flush-valve seal into the bowl.
Watch the tank after a normal flush. Note the water level, whether the chain catches, whether the flapper seats, and whether water continues through the refill or overflow path.
Check the flapper or flush seal
The flapper should lift freely and settle flat over the flush opening. Mineral buildup, warping, a tangled chain, or the wrong replacement shape can leave a small gap. Some toilets use a canister-style seal instead of a flapper.
Gently press the seal down. If the sound stops, the sealing surface, chain, or seal is likely involved. Clean loose debris without scratching the seat. Use a compatible replacement; a universal part that does not match the valve can continue leaking.
Check water level and the overflow tube
The water should stop below the top of the overflow tube according to the fixture's design. If water continuously spills into the tube, the float may be set too high, stuck, rubbing the tank, or attached to a fill valve that no longer closes.
Adjust only by the manufacturer's intended control. Bending unfamiliar parts or forcing a corroded screw can break the valve and create a full-flow leak.
Inspect the fill valve and refill tube
A fill valve can collect sediment or wear internally. It may hiss, pulse, fill slowly, or fail to close even when the float rises. The small refill tube should discharge into the overflow as designed, not sit deeply where it can siphon water.
Cleaning procedures vary by valve. If the part is old, brittle, or difficult to service, replacement with a compatible valve may be more reliable than repeated adjustment.
When the handle or chain is the real problem
A loose handle, corroded lever, chain that is too tight, or chain caught under the flapper can keep the seal open. The chain needs enough slack for the flapper to close without becoming tangled.
If the handle binds, do not force it. Tank hardware can crack porcelain when overtightened. Replace worn components with care and support the lever correctly.
Use a dye test for a silent tank-to-bowl leak
A toilet can lose water without an obvious hiss. When the bowl is clear and the toilet will not be used, place a small amount of toilet leak-detection dye or food coloring in the tank, wait about ten minutes, and watch the bowl without flushing. Color appearing in the bowl confirms a tank-to-bowl path, but it does not by itself distinguish a flapper, canister seal, flush-valve seat, crack, or installation problem.
Flush immediately after the observation so dye does not stain the fixture. If the test is negative but the fill valve still runs into the overflow, focus on float, water-level, refill-tube, and fill-valve behavior. A repeatable test is more useful than replacing both sides of the tank mechanism at once.
Pressure and water quality can shorten part life
High water pressure can make fill valves noisy and contribute to repeated failure. Mineral deposits can interfere with seals and moving parts. If several toilet valves fail, faucets drip, or supply hoses show stress, a whole-house pressure check is more useful than replacing identical parts again.
Scale on one toilet does not automatically justify a whole-house treatment system. Measure pressure and test the water before selecting a broader solution.
Repair or replace the toilet?
A sound bowl and tank can often be rebuilt. Replacement becomes reasonable when porcelain is cracked, the fixture rocks because of damage, parts are proprietary and unavailable, flushing remains poor after drain and component checks, or a more accessible or water-conscious model is desired.
Before replacement, verify rough-in distance, water connection, floor condition, door clearance, and flange height. The toilet must fit the room and the drain connection—not just the shopping cart.
- Do not keep flushing a clogged bowl
- Use the local shutoff gently
- Match repair parts to the flush valve
- Check pressure if failures repeat
- Inspect the flange and floor when the toilet moves
Prepare for a productive service visit
Before a service visit, leave the tank assembled and photograph the water level and parts after a normal flush. Note whether the sound is constant or returns every few minutes, whether pressing the flapper stops it, and whether the local shutoff operates without leaking. If the bowl is also slow or rising, stop flushing and report that separately because a drain obstruction changes the immediate priority.
If replacement is being considered, measure from the finished wall to the center of the floor bolts without including the baseboard, and photograph door, wall, cabinet, and supply-valve clearances. Keep any model information for an existing bidet seat or specialty attachment. A plumber can then evaluate the flange and floor after removal and confirm that the new fixture, shutoff, connector, and accessories fit the actual rough-in rather than a showroom assumption.
What to do next
If a compatible seal or simple adjustment does not stop the cycle, Brentwood Plumbing & Heating can inspect the toilet, shutoff, supply, pressure, and drain connection. Fixing the reason for repeat failure saves more than swapping parts at random.